

From plan to UI architecture
Clicking Generate Frontend on the plan page starts by generating a User Interface Architecture — every screen your app needs and how someone moves between them, worked out from your plan. When it finishes, the Frontend tab opens on the Sitemap view: every planned screen as a card, grouped by module and color-coded by who can access it (Public, Auth, Onboarding, Private, Admin).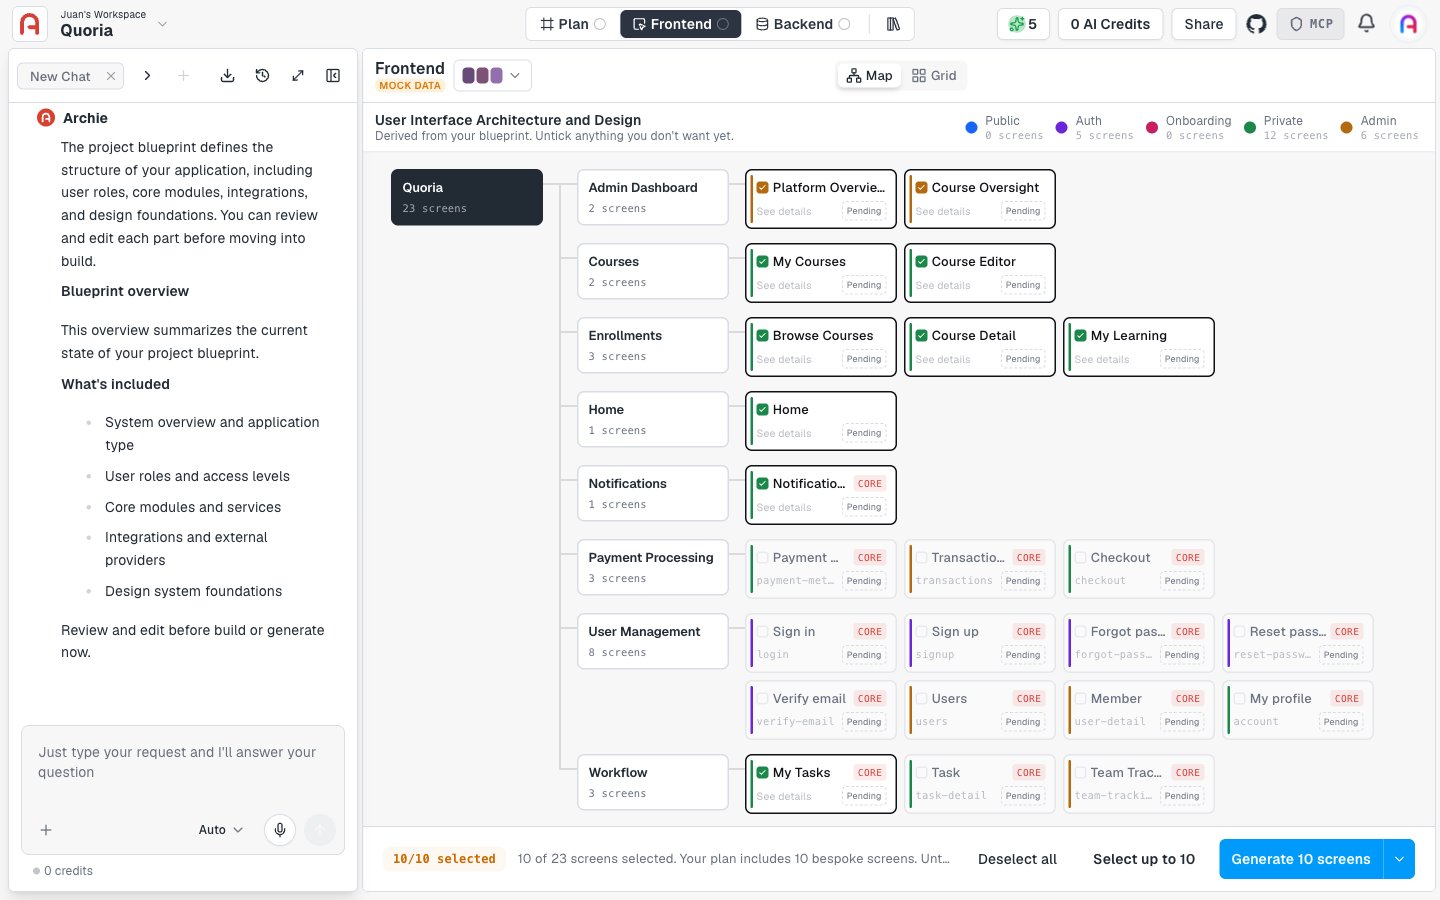
Reviewing a screen before generating it
Click See details on any pending screen to open its spec before any code exists: purpose, route, screen metadata (module, capabilities, navigation group), permissions (view-only vs. manage access by user type), and two tabs — Key Jobs (what the screen must let someone do) and Layout Specs (its structure). Edit any of it, then click Generate screen to build that screen from the spec.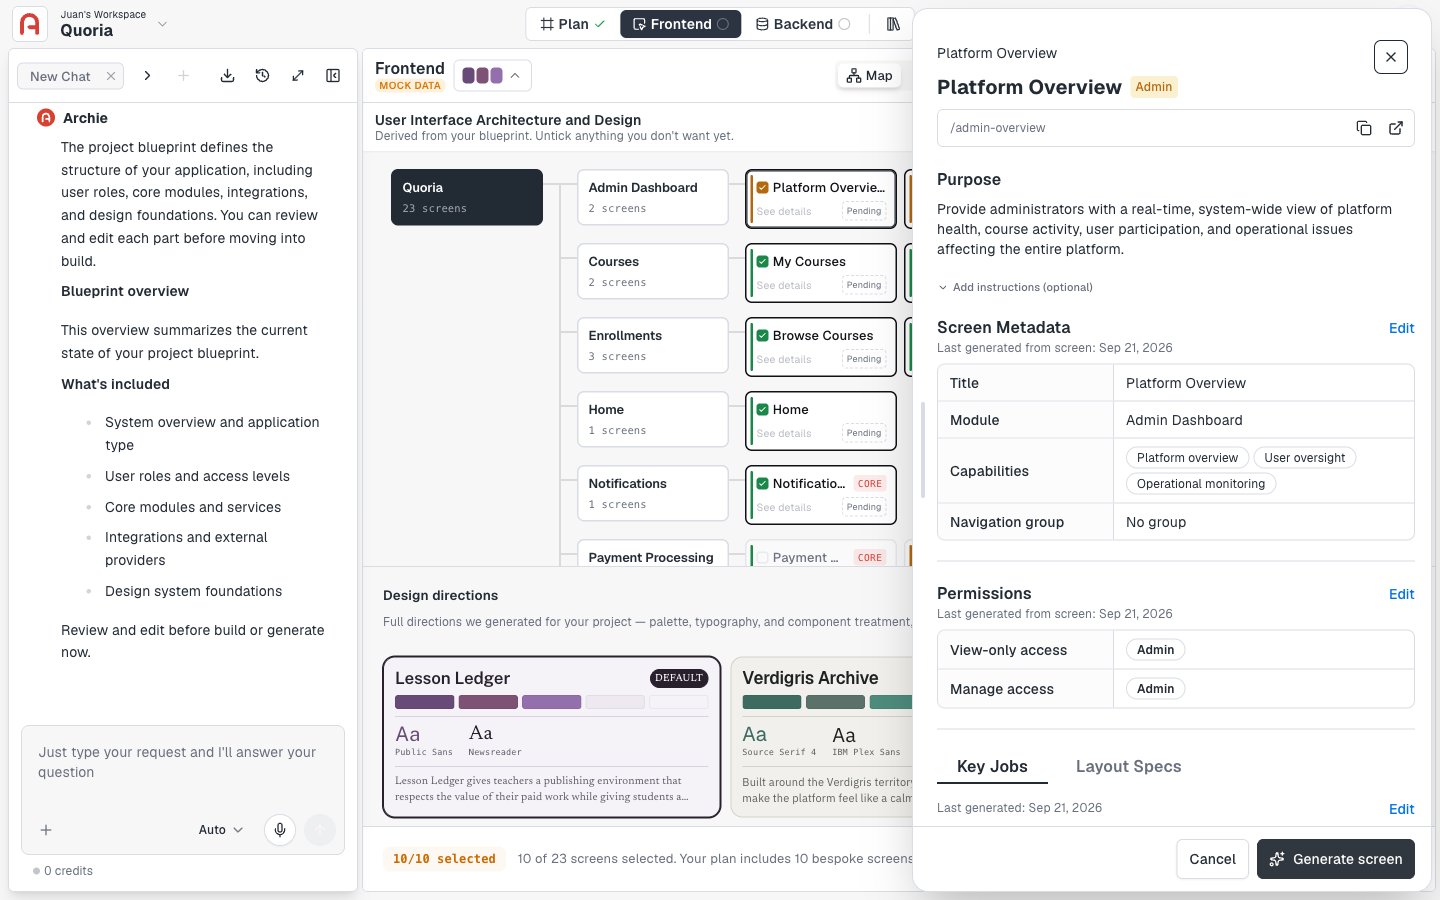
Generating the prototype
The sitemap arrives with a sensible default selection already ticked — typically the bespoke screens your plan calls out specifically. You don’t have to click Select all: untick anything you don’t need yet, or tick additional screens, and the screen count and the Generate button update to match.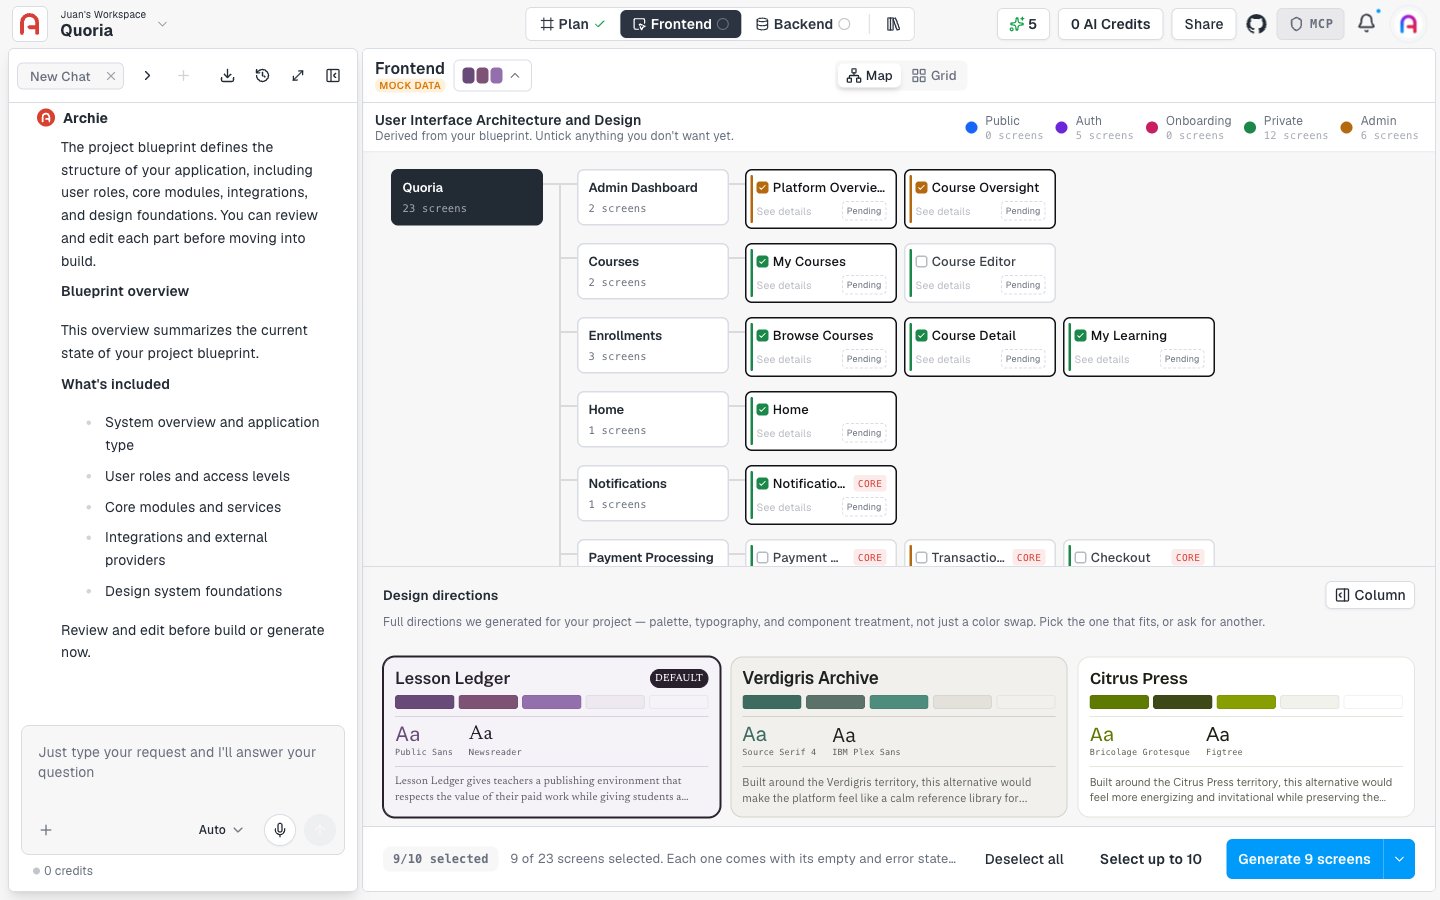
From prototype to real app
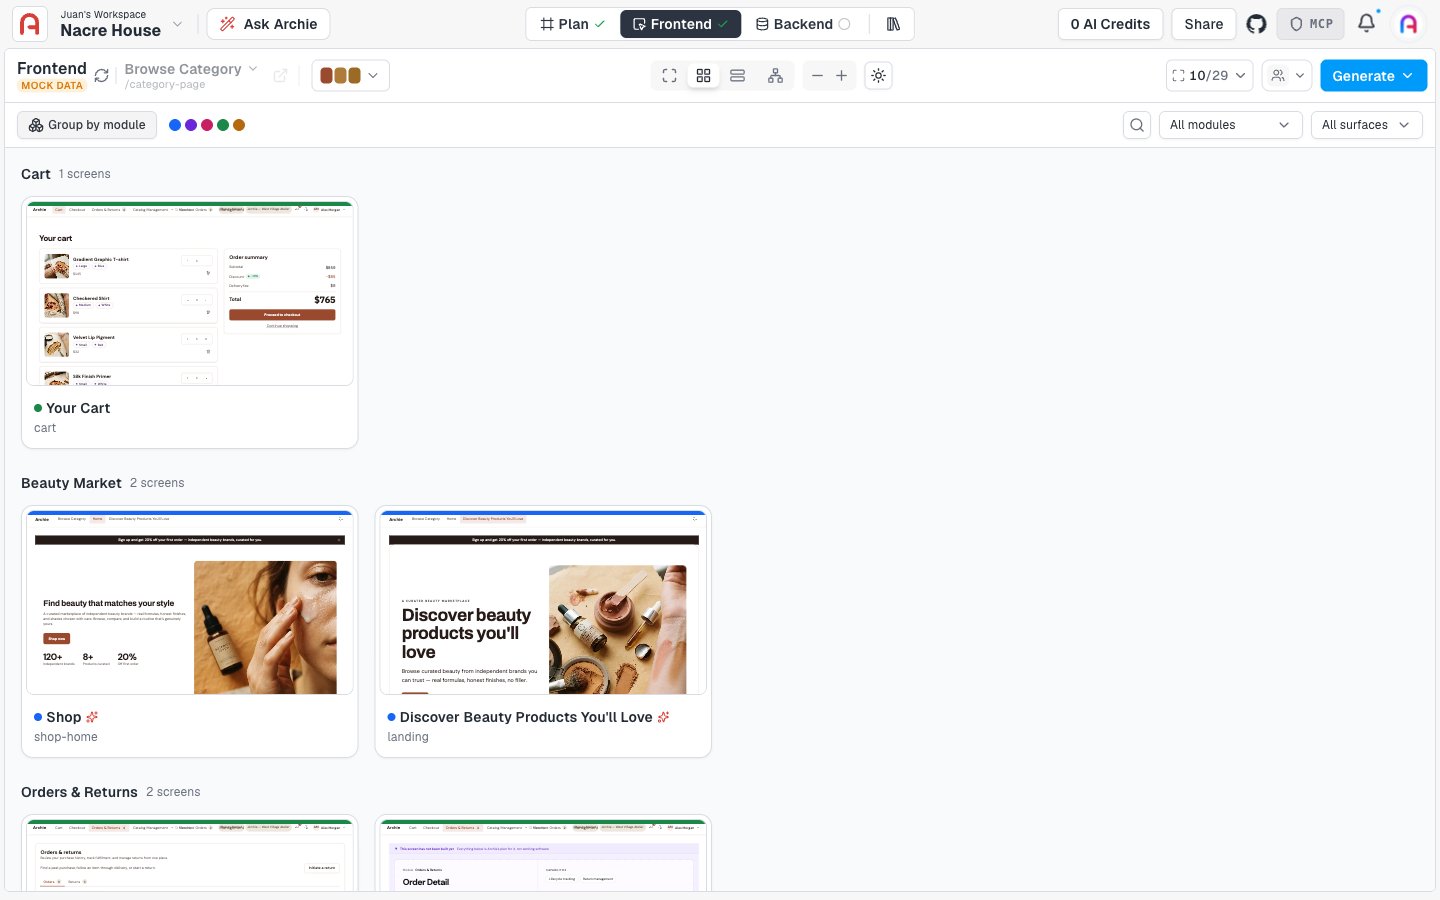
Once a prototype exists, the plan page’s bottom action becomes Generate Full-Stack — it turns your prototype and plan into a real, deployed application with a working frontend connected to Archie Core. From there, use Talking to Archie, the visual editor, or the code editor to keep iterating.FAQ
Do I have to generate every screen at once?
Do I have to generate every screen at once?
No. Tick only the screens you want built and click Generate. Untouched screens keep whatever state they were in — pending or already generated.
Can I change the UI architecture after generating some screens?
Can I change the UI architecture after generating some screens?
Yes. Ask the chat to add, remove, or restructure screens, or use Re-imagine on an individual screen. Regenerating a screen replaces its current design.
How many times will I generate?
How many times will I generate?
Most projects tick a handful of screens, review them, then generate the rest once the pattern looks right. If you are regenerating the same screen often, its spec probably needs another pass first.