

Validations the importer runs
Every constraint defined on the table applies during import:- Type checks — strings can’t go into number fields, invalid dates are rejected.
- Mandatory fields — every required field must be present in the CSV (or mapped to a column that has a value).
- Unique constraints — rows with duplicate values for unique fields are rejected.
- Enum values — values for inline enum and user-defined fields must match the allowed list.
- Foreign keys — relationship fields must reference existing rows in the related table.
Step-by-step
1
Open the Data tab
Open the table in the Data Model and switch to the Data tab.
2
Click Import
The button sits in the toolbar. The Import Data dialog opens.
3
Upload your CSV file
Drag and drop a CSV file or click Choose File. Need a starting point? Click Download Table Template for a CSV pre-headered with the table’s field names.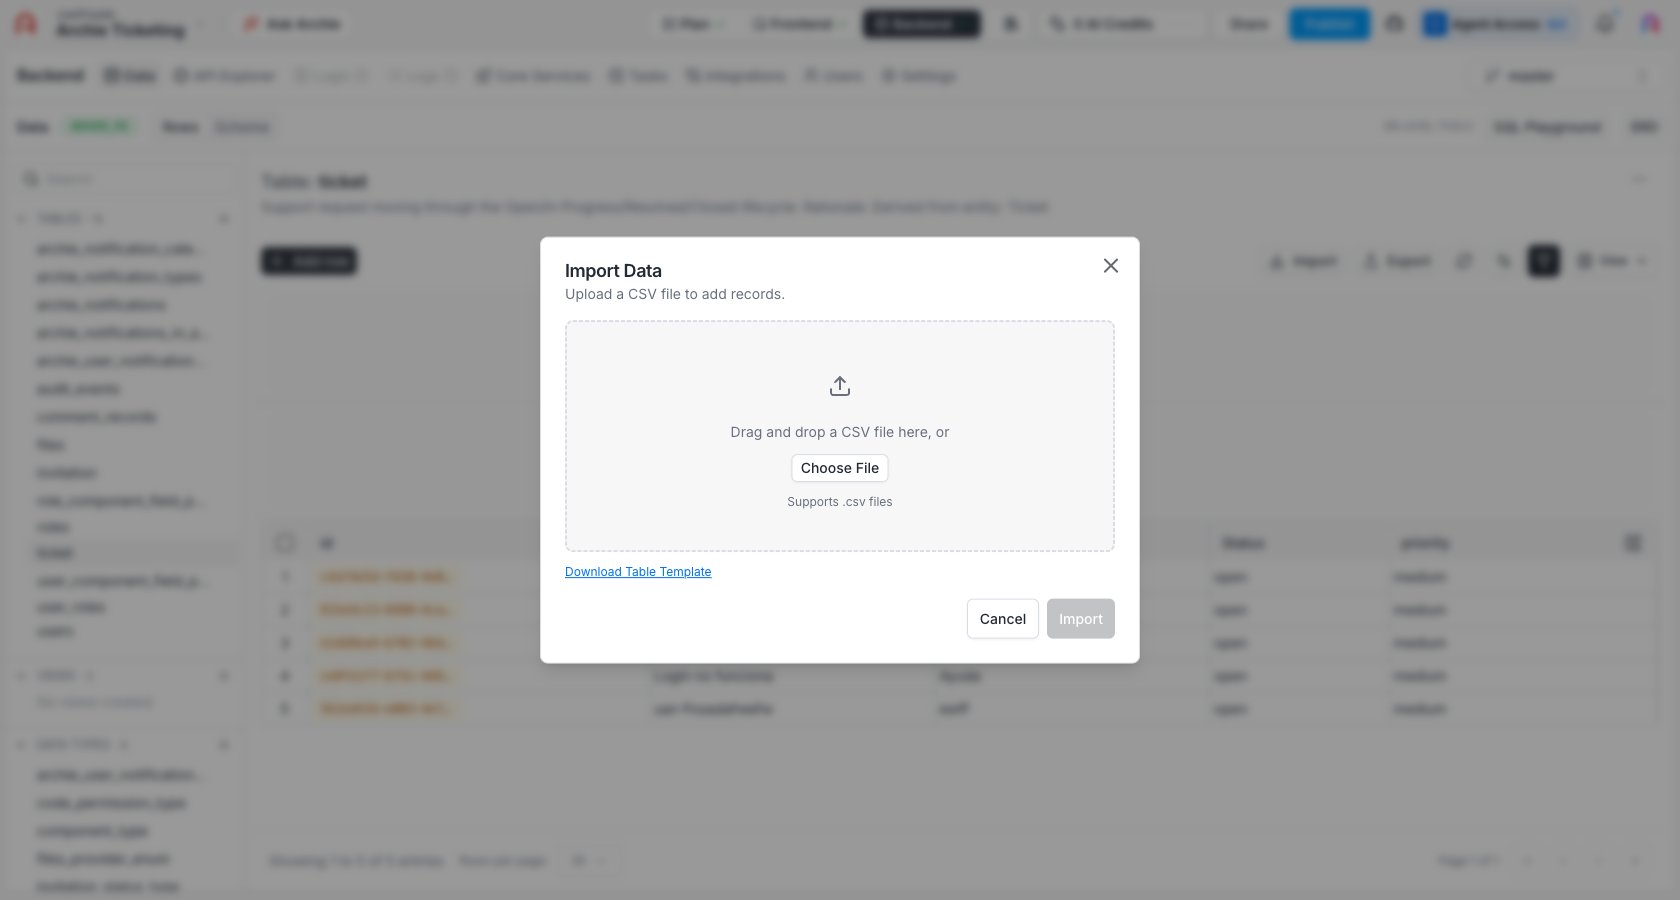
4
Review the preview
The dialog shows a Data Import Preview — up to 5 rows, matched to fields by column header. System columns (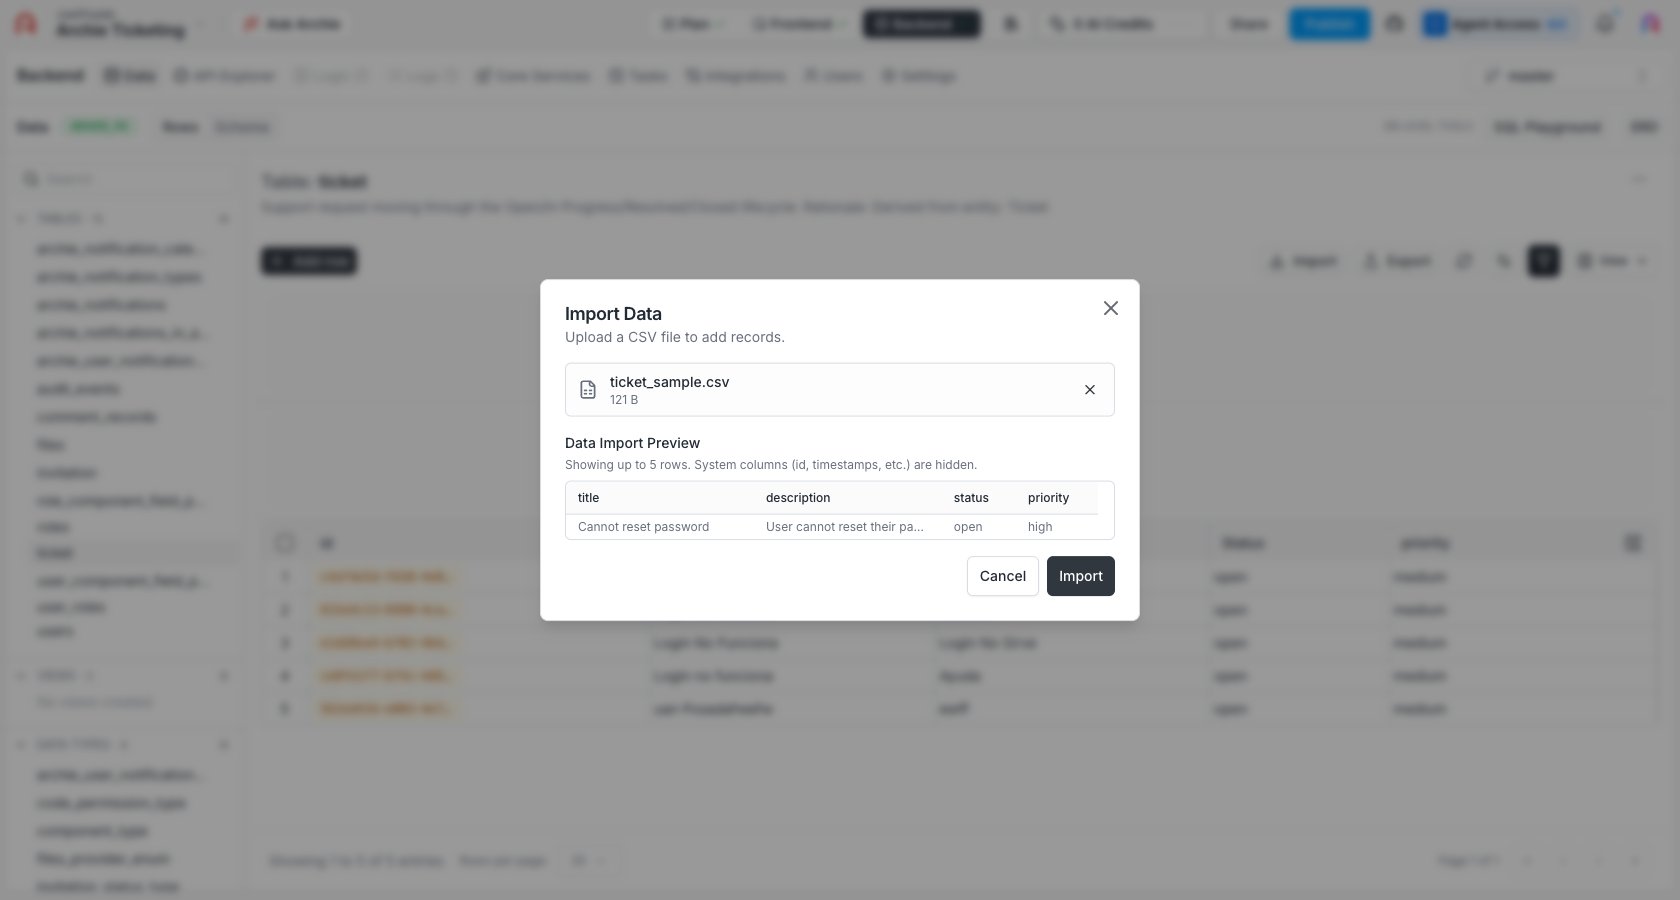
id, timestamps, and so on) are hidden here since the importer generates them automatically.5
Click Import
The importer inserts the rows and runs the same validations as adding a row by hand. Rows that fail are reported with the offending field and reason; valid rows are still inserted.
Preparing the CSV
A few small things make imports go smoothly:- Match column headers to field names. The auto-mapper relies on header names; matching field names exactly removes a manual step.
- Use ISO 8601 for dates.
2025-03-14for dates,2025-03-14T10:30:00Zfor timestamps. - Use the exact enum values. Enum and user-defined fields are case-sensitive — match the casing defined on the Data Type.
- Don’t include id, created_at, or audit columns. Archie generates these automatically. If they’re in the CSV, leave them unmapped.
- Reference rows by their primary key for relationships. If a CSV column maps to a relationship field, populate it with the related row’s
id(typically a UUID).
Permissions
Importing data uses the same write permissions as adding rows through the Data Viewer. A user who can’t write to a field through the API can’t import into it either. Configure access in Role-Based Access.FAQ
What happens if a row in my CSV fails validation?
What happens if a row in my CSV fails validation?
The failing row is skipped and reported back with the field and reason. The remaining valid rows are still imported. Fix the offending rows and re-run the import for them only.
Can I import into a table that has relationships?
Can I import into a table that has relationships?
Yes. Map the relationship column in your CSV to the primary key (usually the UUID
id) of the related row. The importer enforces referential integrity, so the related row must already exist.Should I include the id column in my CSV?
Should I include the id column in my CSV?
Generally no — Archie generates IDs automatically. Include the id column only when you’re explicitly upserting rows with known IDs (for example, restoring an export).
What's the maximum file size?
What's the maximum file size?
The importer batches rows so size isn’t a hard ceiling, but very large files can take a while. For multi-million-row imports, consider splitting the file or scripting the load through a custom function.
Will the import overwrite existing rows?
Will the import overwrite existing rows?
No. The importer inserts new rows. To update existing rows in bulk, use the SQL Playground or a custom function.